This idea came as a present idea for my brother-in-law. His favorite superhero is Batman. I thought a Batarang/magnet combo he could use practically, without just throwing at his wife, would be a good compromise.
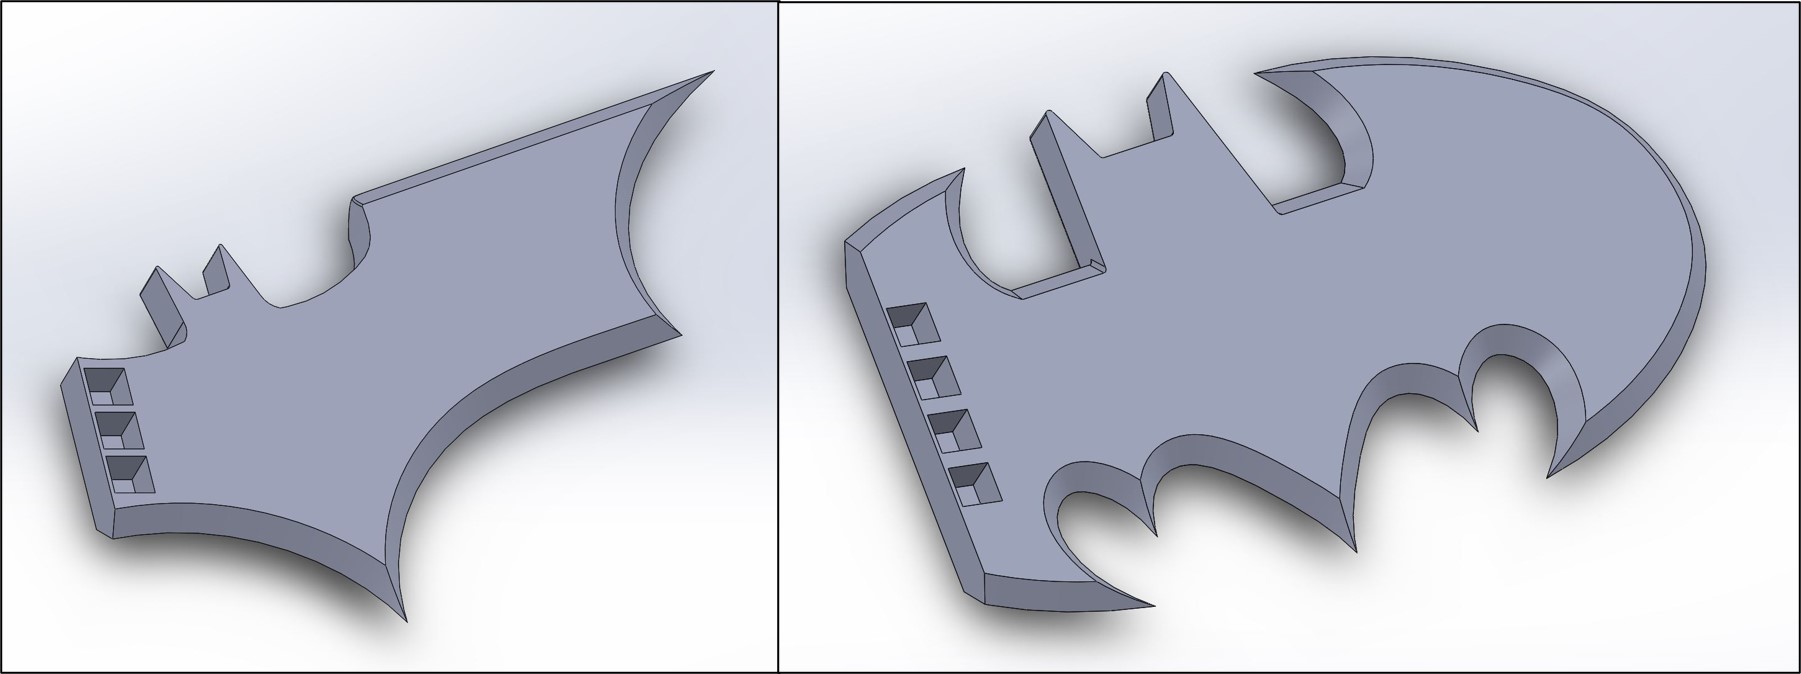
I started off with silhouettes of Batarangs through the ages. I then chose a couple designs I thought were more popular, including a classic design and modern design.
I modeled the designs in CAD by importing the images and tracing the borders with the spline feature. To get the scale right I decided how long the Batarangs should be and scaled the traced borders to the appropriate lengths.
Following that, I thickened it and added a chamfer edge to the outside.
 After the whole Batarangs were complete, I needed to add voids for the magnets to be embedded. I cut the Batarang so it looked like it would had it been thrown into the metal surface.
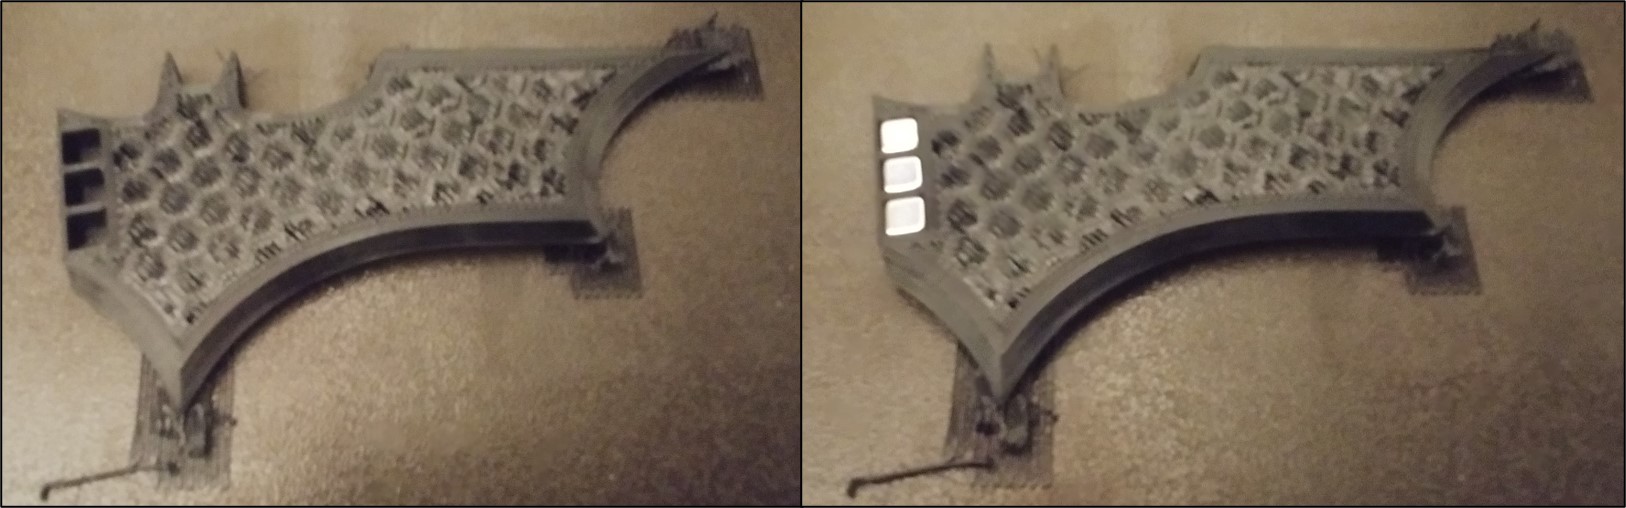
then placed 2 voids spaced 1mm from the edge. After printing the part, I found there was not enough magnetic force to hold the Batarang up. I added more voids and brought them as close to the edge as I could, 0.5mm. This still allowed the 3D slicing software to extrude material there, while maintaining a minimum thickness.
I also reduced the infill percentage from 50% down to 15% to decrease the weight of the Batarang.
After the whole Batarangs were complete, I needed to add voids for the magnets to be embedded. I cut the Batarang so it looked like it would had it been thrown into the metal surface.
then placed 2 voids spaced 1mm from the edge. After printing the part, I found there was not enough magnetic force to hold the Batarang up. I added more voids and brought them as close to the edge as I could, 0.5mm. This still allowed the 3D slicing software to extrude material there, while maintaining a minimum thickness.
I also reduced the infill percentage from 50% down to 15% to decrease the weight of the Batarang.
 In order to get the magnets embedded, I added a change material line on the first layer above the voids then replaced that code with a user pause. This gave me time to insert the magnets and press the resume button when ready.
 I painted the first Batarangs with a gloss black spray paint as they were printed with purple PETG filament. The next few, I printed with black PETG filament. I struggled to find the painted one between them all, so I decided not to paint the ones printed with black filament.
Here are the complete Batarangs. Now my brother-in-law is ready to fight crime!
I painted the first Batarangs with a gloss black spray paint as they were printed with purple PETG filament. The next few, I printed with black PETG filament. I struggled to find the painted one between them all, so I decided not to paint the ones printed with black filament.
Here are the complete Batarangs. Now my brother-in-law is ready to fight crime!

After the whole Batarangs were complete, I needed to add voids for the magnets to be embedded. I cut the Batarang so it looked like it would had it been thrown into the metal surface.
then placed 2 voids spaced 1mm from the edge. After printing the part, I found there was not enough magnetic force to hold the Batarang up. I added more voids and brought them as close to the edge as I could, 0.5mm. This still allowed the 3D slicing software to extrude material there, while maintaining a minimum thickness.
I also reduced the infill percentage from 50% down to 15% to decrease the weight of the Batarang.
In order to get the magnets embedded, I added a change material line on the first layer above the voids then replaced that code with a user pause. This gave me time to insert the magnets and press the resume button when ready.
I painted the first Batarangs with a gloss black spray paint as they were printed with purple PETG filament. The next few, I printed with black PETG filament. I struggled to find the painted one between them all, so I decided not to paint the ones printed with black filament.
Here are the complete Batarangs. Now my brother-in-law is ready to fight crime!